simply2say
Sunday, 6 October 2024
Monday, 11 March 2024
Set the boot files and boot the system from the GRUB prompt.
https://www.linuxfoundation.org/blog/blog/classic-sysadmin-how-to-rescue-a-non-booting-grub-2-on-linux
When you’re at the grub> prompt, you have a lot of functionality similar to any command shell such as history and tab-completion.
- Use the ls command to list the contents of various partitions
and identify the linux root partitiongrub> ls
- The boot/ folder in the root partition would contain the linux
kernel and intrd image (initial ramdisk image)
- Set the root partition, kernel and intrd image using grub> prompt
grub> set root=(hd0,gpt2)
grub> linux /boot/vmlinuz-3.13.0-29-generic root=/dev/sda2
grub> initrd /boot/initrd.img-3.13.0-29-generic
grub> boot
The first line sets the partition that the root filesystem is on. The second line tells GRUB the location of the kernel you want to use. Start typing
/boot/vmli, and then use tab-completion to fill in the rest. Typeroot=/dev/sdXto set the location of the root filesystem. Yes, this seems redundant, but if you leave this out you’ll get a kernel panic. How do you know the correct partition? hd0,1 = /dev/sda1. hd1,1 = /dev/sdb1. hd3,2 = /dev/sdd2. I think you can extrapolate the rest.The third line sets the
initrdfile, which must be the same version number as the kernel.The fourth line boots your system.
- When you have successfully booted your system, run these commands to fix GRUB permanently:
sudo update-grub sudo grub-install /dev/sda
Install TeXstudio on Ubuntu
Add the ppa
sudo add-apt-repository ppa:sunderme/texstudio
sudo apt install texstudio
sudo apt install texlive-latex-extra
sudo apt install texlive-bibtex-extra
sudo apt install biber
## To solve eps figures not included in tex output
sudo apt install texlive-font-utils
Sunday, 10 March 2024
Compress pdf on Ubuntu
$ gs -sDEVICE=pdfwrite -dCompatibilityLevel=1.4 -dPDFSETTINGS=/screen -dNOPAUSE -dQUIET -dBATCH -sOutputFile=output.pdf input.pdf
-dPDFSETTINGS=/screen lower quality, smaller size. (72 dpi)
-dPDFSETTINGS=/ebook for better quality, but slightly larger pdfs. (150 dpi)
-dPDFSETTINGS=/prepress output similar to Acrobat Distiller "Prepress Optimized" setting (300 dpi)
-dPDFSETTINGS=/printer selects output similar to the Acrobat Distiller "Print Optimized" setting (300 dpi)
-dPDFSETTINGS=/default selects output intended to be useful across a wide variety of uses, possibly at the expense of a larger output file
Friday, 29 April 2022
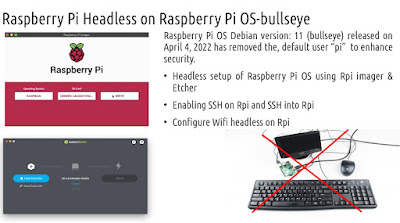
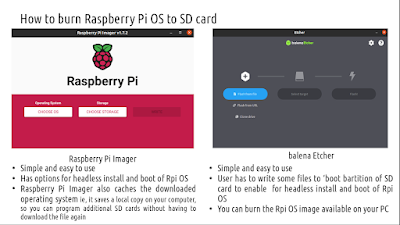
Raspberry Pi Headless on Raspberry Pi OS Debian version: 11 (bullseye)
Debian version: 11 (bullseye) of Raspberry Pi OS has removed the, default user “pi” to enhance security. As the result applications that relied on the default user 'pi' would break. Here we shall see how to
- Create a default user in Raspberry Pi OS (bullseye)
- Enable SSH on Rpi and SSH into it
- Configure wifi on Rpi
Contents of the wpa_supplicant.conf for configuring wifi on Rpi headless (see video for details)
Sunday, 25 October 2020
LaTeX crash course
A crash course to get you started with LaTeX, LaTeX, which is pronounced «Lah-tech» or «Lay-tech», is a document preparation system for high-quality typesetting. It is most often used for medium-to-large technical or scientific documents but it can be used for almost any form of publishing.
LaTeX is not a word processor! Instead, LaTeX encourages authors not to worry too much about the appearance of their documents but to concentrate on getting the right content [1].
Tuesday, 7 July 2020
Grasha's Teaching Style Survey
- Expert (transmitter of information)
- Formal authority (sets standards)
- Personal model (teaches by direct example)
- Facilitator (guides by asking questions, exploring options)
- Delegator (develop students ability to function autonomously)
Tuesday, 23 June 2020
Add virtual environment to Jupyter notebook
Saturday, 20 June 2020
fake news and image search tools
Friday, 29 May 2020
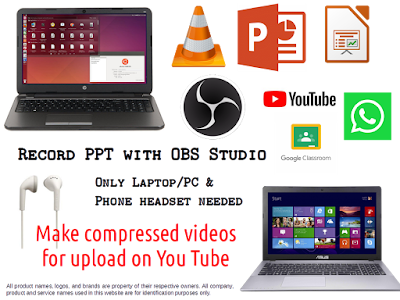
OBS Studio crash course
https://obsproject.com
A crash course to use OBS Studio:
You can record a video of ppt in just 5 minutes to share with your students.
There are lots of videos available on YouTube to use the advanced features of OBS Studio
Download the help file
Required Hardware:
- Laptop / PC
- Phone headset
- Internet connectivity
- Patience and time
Watch the video (8 minutes) from this link to record the first video using OBS Studio
- Google Classroom
- Youtube Channel
Or upload the video on your You Tube channel and share the link on the platforms above. Share video recordings of short video clips (6- 8 minutes) in small portions of the topic to keep the audience engaged.
Thursday, 16 April 2020
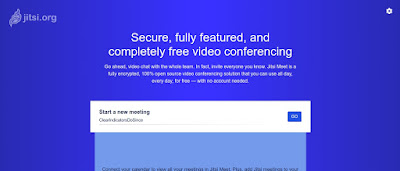
How to use Jitsi Meet, an open source alternative
- Go to https://jitsi.org/jitsi-meet/
- Scroll down the page and click "Start a call"
- On the next screen you will see a randomly generated meeting name scrolling below the field "Start a new meeting"
- Click in the space below and enter a suitable meeting name for example, meeting_may27
- Click Go, and your meeting gets started
- After your meeting has started click the "i" icon in the bottom-right corner of the screen.
- Select "add password," and then enter your a password in the blank field and press enter.
- You meeting is now password protected
- Again click the "i" icon in the bottom-right corner of the screen. Click the copy icon at the end of the field Link to copy the link
- Share the link copied in step 9 via email/whatspp/sms along with the meeting password (entered in step 7) and share with the expected participants.
- The participants can either paste the link in the browser running on PC/laptop or join meet by logging in via the jitsi meet app from Google play store or App store
- If the meeting is scheduled at a particular time, the admin (ie, person setting the password) has to enter the meet a few minutes before the meeting and perform step 7 once again. Please fill in the same password as shared with participants.
Friday, 14 February 2020
Setting up a Python development environment in Atom
- Download and install Atom from https://atom.io
- On the Linux system activate the Python environment from the terminal ($ conda activate ENV NAME)
- Launch Atom from the environment by typing atom in the terminal.
- Now we shall install some packages to atom to make Python programming easier
- In Atom, go to edit > preferences > install and search for the package you wish to install. Some useful packages for a python ide in atom are
Monday, 3 June 2019
Anti ragging and Aman Kachroo
 |
| Aman Kachoo |
(helpline@antiragging.in)
Friday, 24 May 2019
Installing nussl - music signal processing
Steps to install nussl on Ubuntu 18.04 LTS
====================================
1) First we need to download Anaconda. Go to https://repo.anaconda.com/archive/ to download the latest version of Anaconda
After the download is done, and compare it with the one on the Website, just to be sure.
2) Verify the MD5SUM
md5sum Anaconda2-2019.03-Linux-x86_64.sh
3) Install Anaconda
bash Anaconda2-2019.03-Linux-x86_64.sh
4) Activating the Installation
source ~/.bashrc
5) Use the conda command to test if installation & activation was successful.
conda list
6) Making an anaconda env
conda will create a new env named audio_test_env with numpy, scipy, and matplotlib installed in it.
conda create --name audio_test_env numpy scipy matplotlib python=2.7
or
conda create --name audio_test_env numpy scipy matplotlib python=3.6
7) Now, we need to activate the env. Run the following command:
$ source activate audio_test_env
(audio_test_env) $
Now we’re in the conda env.
8) From within the conda env, you can do a regular pip install
pip install nussl
or:
sudo pip install nussl
9) We can exit conda env with the following command:
(audio_test_env) $ source deactivate
or
(audio_test_env) $ conda deactivate
10) Install additional Python packages to a virtual environment.
conda install -n yourenvname [package]
11)To delete a conda environment, enter the following, where yourenvname is the name of the environment you wish to delete.
conda remove -n yourenvname --all
conda remove -n yourenvname --all
12) updating conda
conda update --all
13) Dependencies for nussl ( in the virtual environment)
(audio_test_env) $ pip install musdb
(audio_test_env) $ pip install museval
14) Installing spyder in python 2.7 environment
(audio_test_env) $ conda install spyder
15) Spyder environment managing
conda install spyder-kernels=0.*
if using conda/Anaconda, or
pip install spyder-kernels==0.*
if using pip/virtualenv.
After installing via either method, run the following command inside the same environment:
python -c "import sys; print(sys.executable)"
and copy the path returned by that command (it should end in python, pythonw, python.exe or pythonw.exe, depending on your operating system).
Deactivate that environment, activate the one in which Spyder is installed (if you've installed it in its own environment) and start Spyder as you normally would.
After Spyder has started, navigate to Preferences > Python Interpreter > Use the following interpreter and paste the path from Step 3 into the text box.
Start a new IPython console. All packages installed in your myenv environment should be available there.
References
==========
https://www.ceos3c.com/open-source/install-anaconda-ubuntu-18-04/
https://www.digitalocean.com/community/tutorials/how-to-install-the-anaconda-python-distribution-on-ubuntu-18-04
https://uoa-eresearch.github.io/eresearch-cookbook/recipe/2014/11/20/conda
https://interactiveaudiolab.github.io/nussl/getting_started/install.html#anaconda-env
Wednesday, 11 July 2018
Skipping acquire of configured file 'main/binary-i386/Packages' as - google earth
open terminal and type
sudo gedit /etc/apt/sources.list.d/google-earth-pro.list
Thursday, 28 June 2018
Okhi Relief Fund PAN
Monday, 11 June 2018
Raspberrry Pi setup
Tuesday, 1 May 2018
Simple Latex Flyer
Flyer tex files
Simple Latex brochure template
Tex files are also posted, feel free to modify and use.
Tri-fold brochure files
